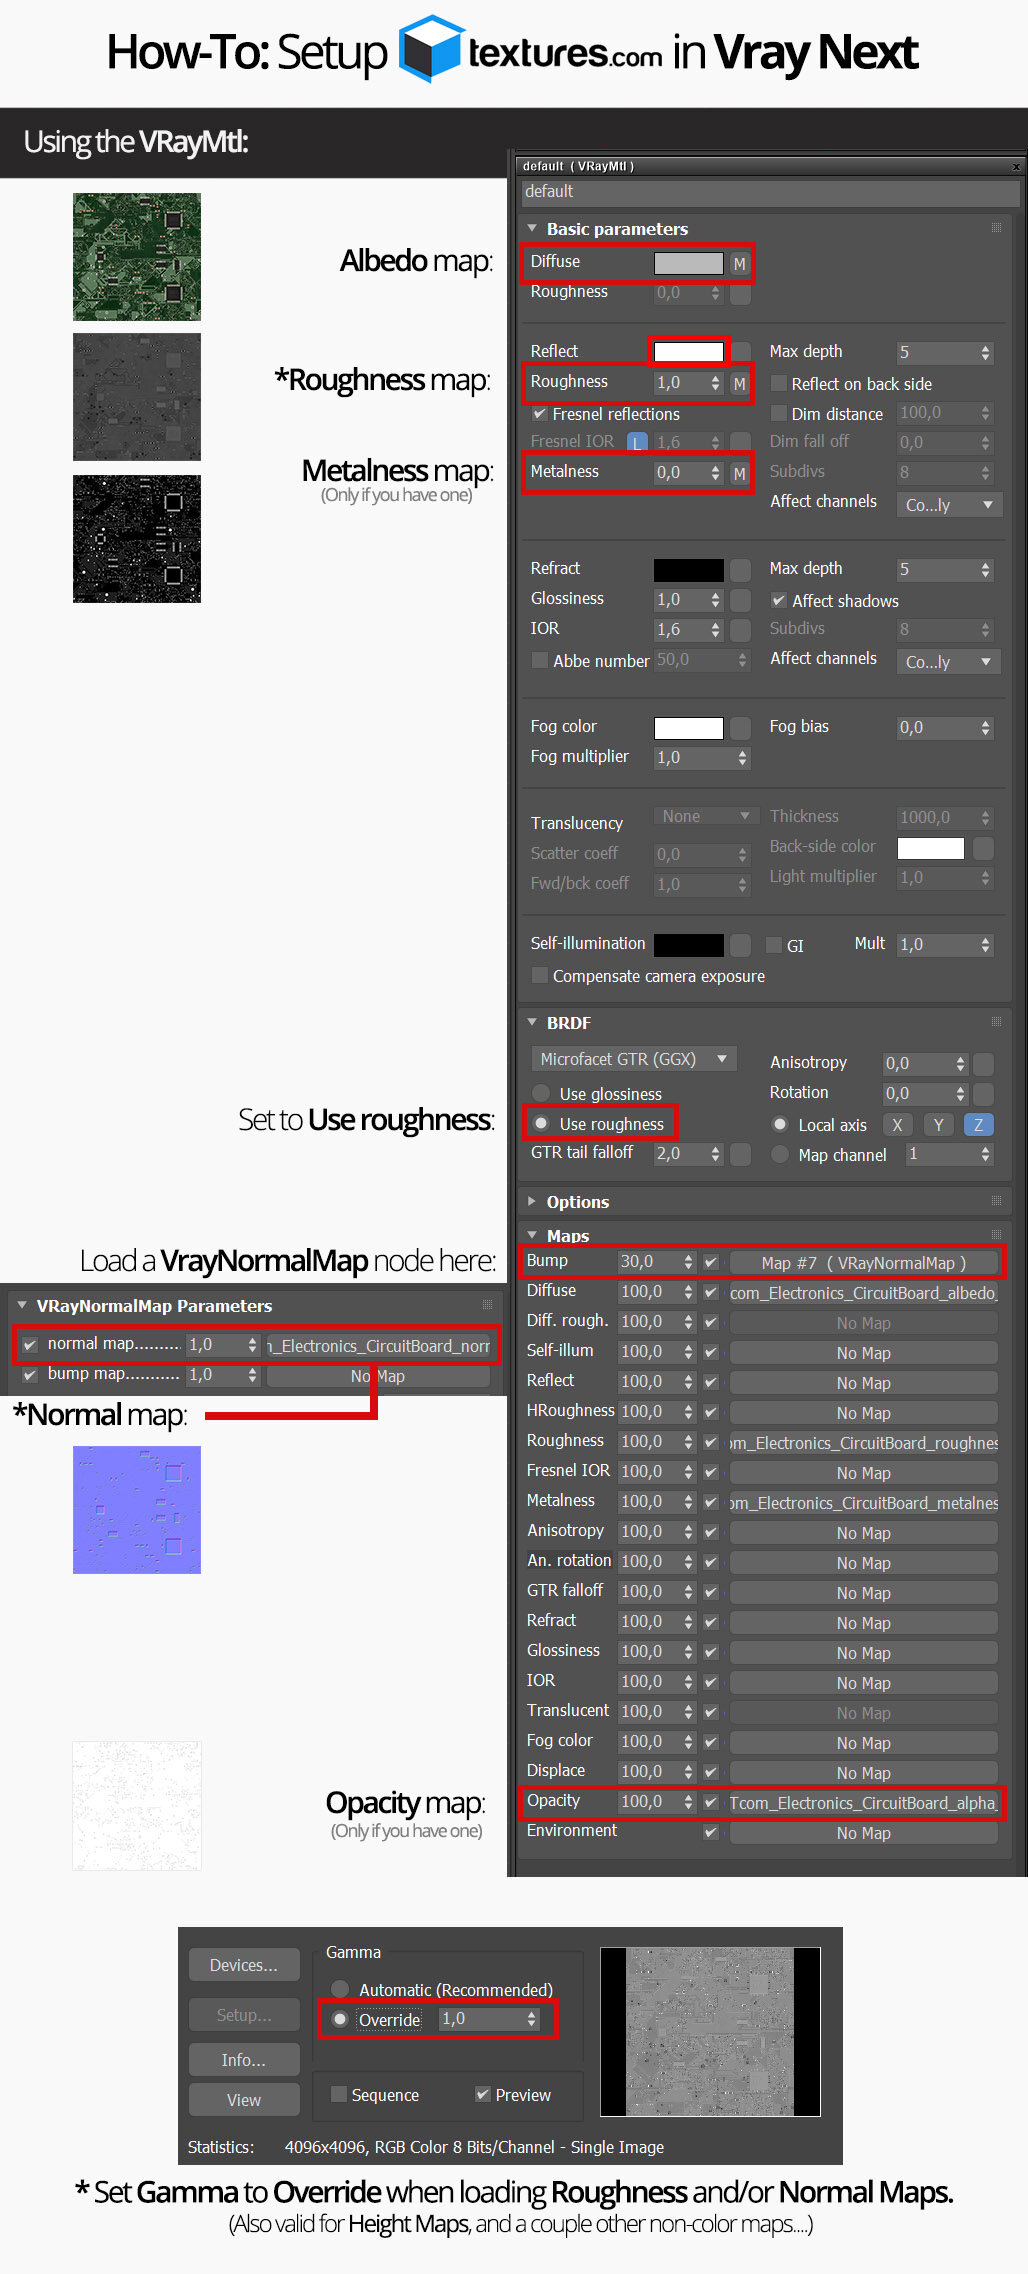
After many (!) mails & requests, we took the freedom to start our new “How-To“ series, where we’ll explore how to use Textures.com materials inside your favorite render engine!
Today, we’re going to explore: Chaos Group VRay Next. (For 3D Max*)
(step-by-step guide featured at the bottom of the page)
Step-by-step Guide:
1.
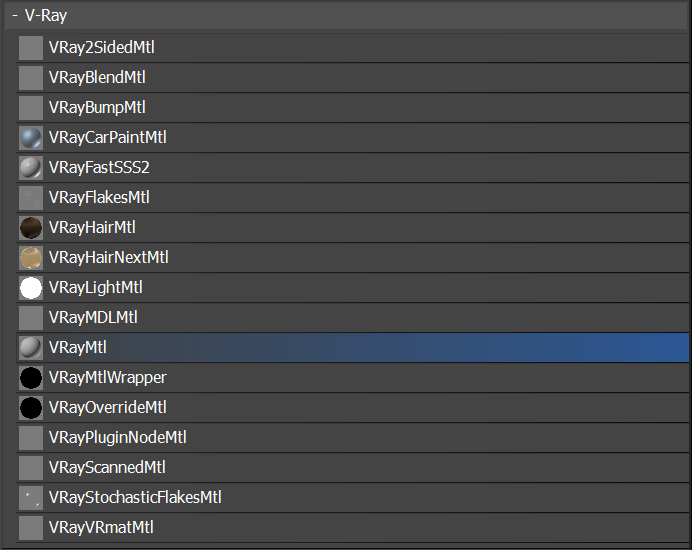
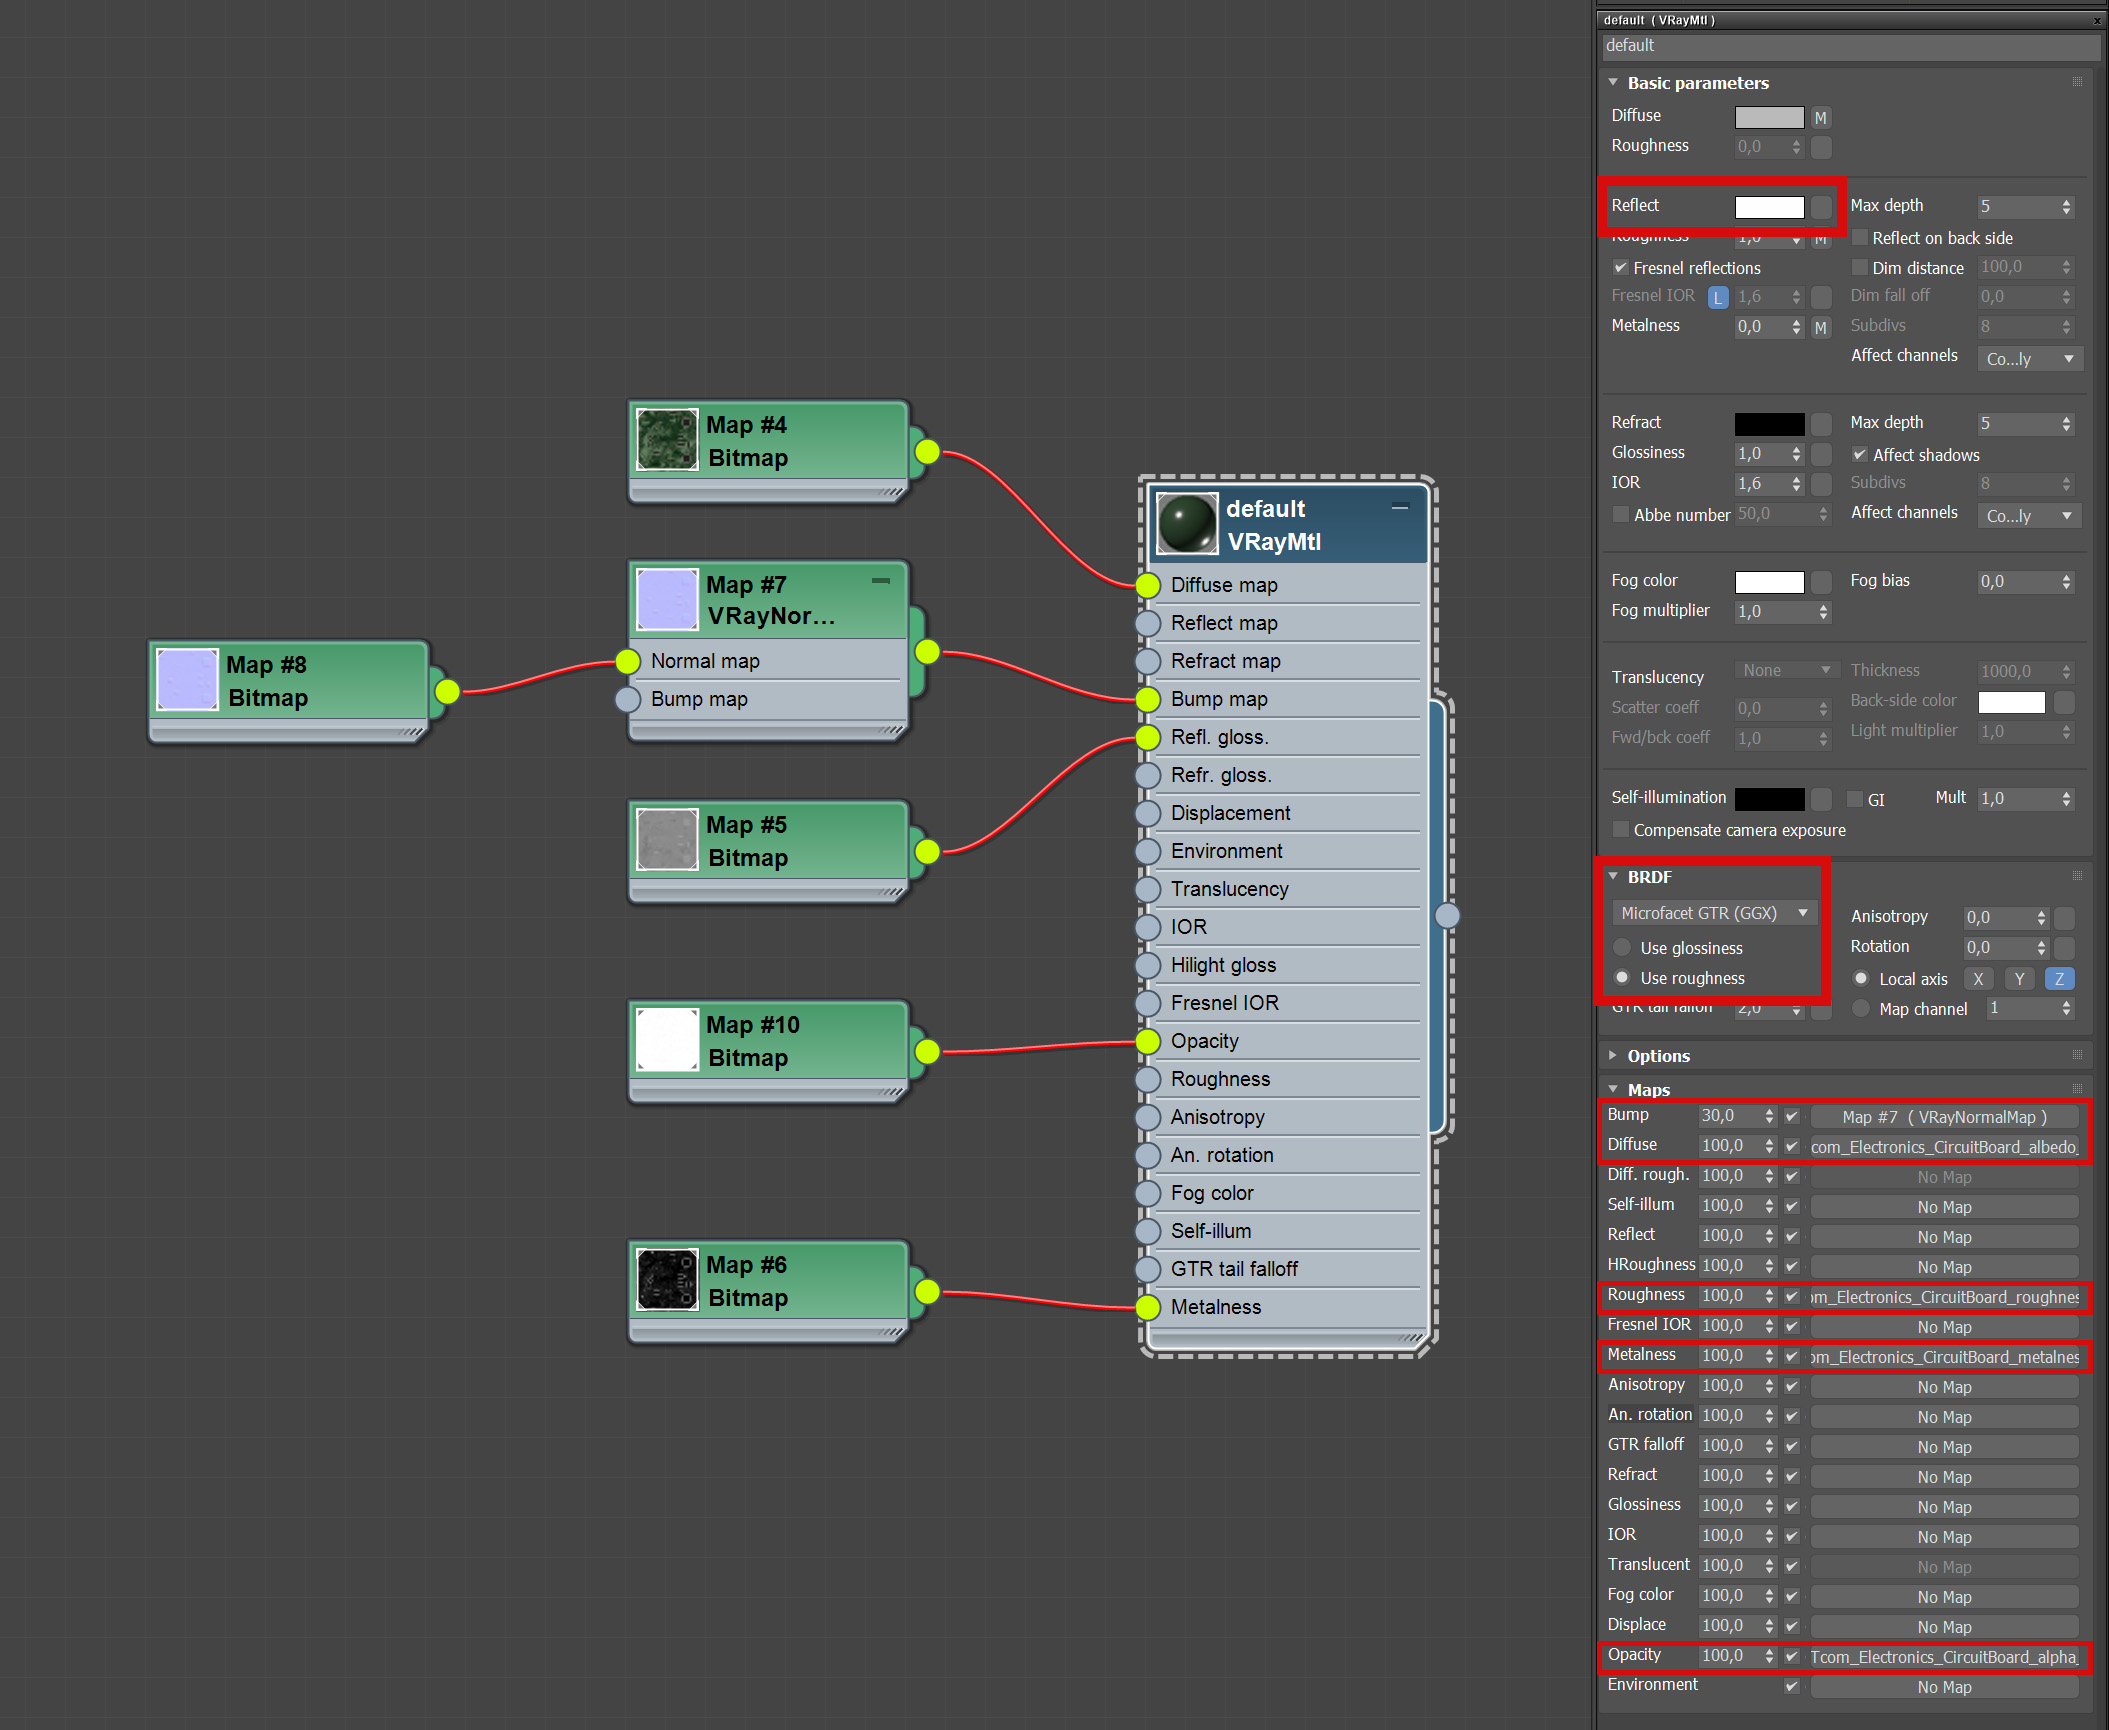
The first step is to select the VRayMtl, which will be the base for our shader.
2.
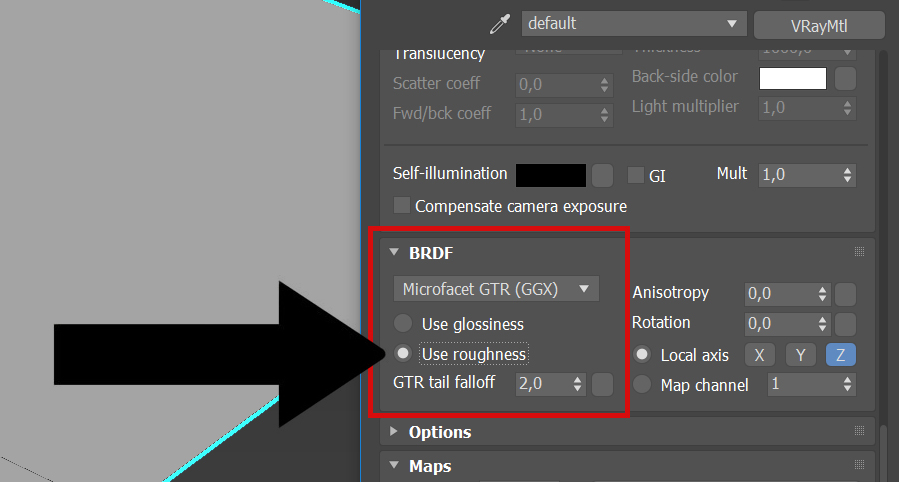
Inside the material editor, find the BRDF Rollout.
Our materials adopt the Metalness workflow, which uses Roughness maps as the default.
Select “Use Roughness“.
(Also make sure GGX is selected, for correct shading behavior)
3.
With the basics now set, time to start loading the maps:
Plug the Albedo map in the Diffuse Slot. (Using a bitmap node)
4.
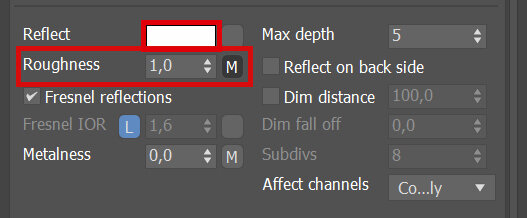
Plug the Roughness map into the Roughness Slot.
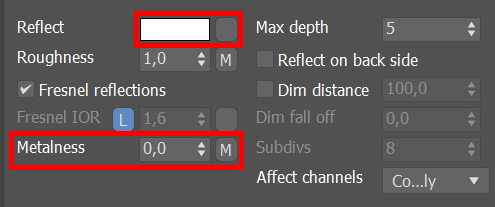
Set Reflect color to White.
There are two Roughness slots, the one we’ll be using is located under the Reflect rollout.
5.
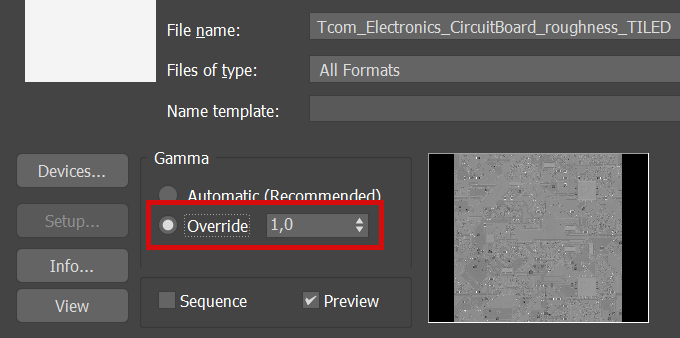
Certain maps hold data that shouldn’t be interpreted as color. To have the information read correctly, we must change the gamma mode:
Select the Override radio button, while loading the bitmap.
(Valid for both Roughness, Normal and also Height Maps.)
6.
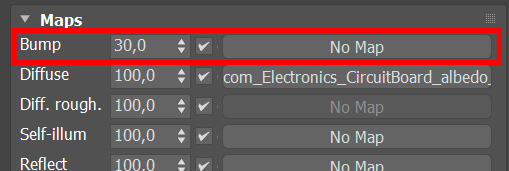
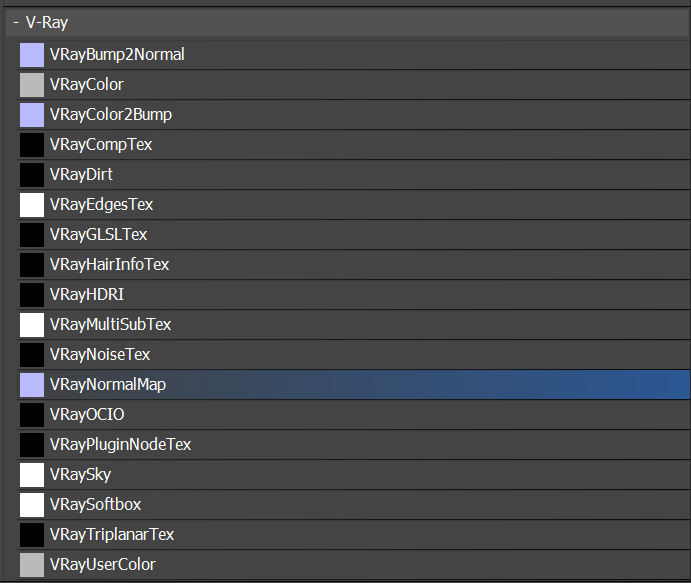
For the Normal Map, we are going to use VRay’s own Normal Map texture loader, since it’s also compatible with VRay Proxies, displacements and so forth.
Load the VrayNormalMap texture into the bump slot.
7.
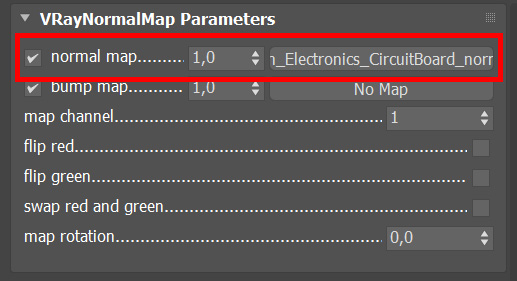
Now, load your Normal Map file in the Normal Map slot.
remember to set Gamma to Override here as well, when loading the map!
8.
If you’re not rendering metallic surfaces (materials that come with a Metallic map), you can pretty much call it done by now.
If you’re rendering metals though, there are some extra steps we need to perform:
Load your Metallic Map into the Metalness slot, and make sure the Reflect color is set to Pure White. (Otherwise metallic parts won’t get rendered correctly)
9.
Also, if your material features transparency, you can easily enable that by plugging the Opacity Map into the Opacity Slot.
This is the final result:
Rendered using VRay Next & VrayDisplacementMod.

