Today, we’re going to explore: MAXtoA
(step-by-step guide featured at the bottom of the page)

Step-By-Step Guide:
1.

The first step is to select the Standard Surface, which will be the base for our shader.
2.

Plug the Albedo map in the Base Color Slot. (Using a bitmap node)
3.

Plug the Roughness map into the Roughness Slot.
4.

While loading this map, make sure to set Gamma to Override.
Also valid for the normal map
5.


And finally, let’s add surface detail with a normal map:
Load an Arnold Normal Map into the Normal (Bump) slot, and plug your Normal Map in the Input, under Maps roll-out menu.
Remember to also set Gamma to Override here!
6.

If you’re not rendering metallic surfaces (materials that come with a Metallic map), you can pretty much call it done by now.
If you’re rendering metals though, there are some extra steps we need to perform:
Load your Metallic Map into the Metalness slot.
7.

Also, if your material features transparency, you can easily enable that by plugging the Opacity Map into the Opacity (Cutout) Slot.
THIS IS THE FINAL RESULT:

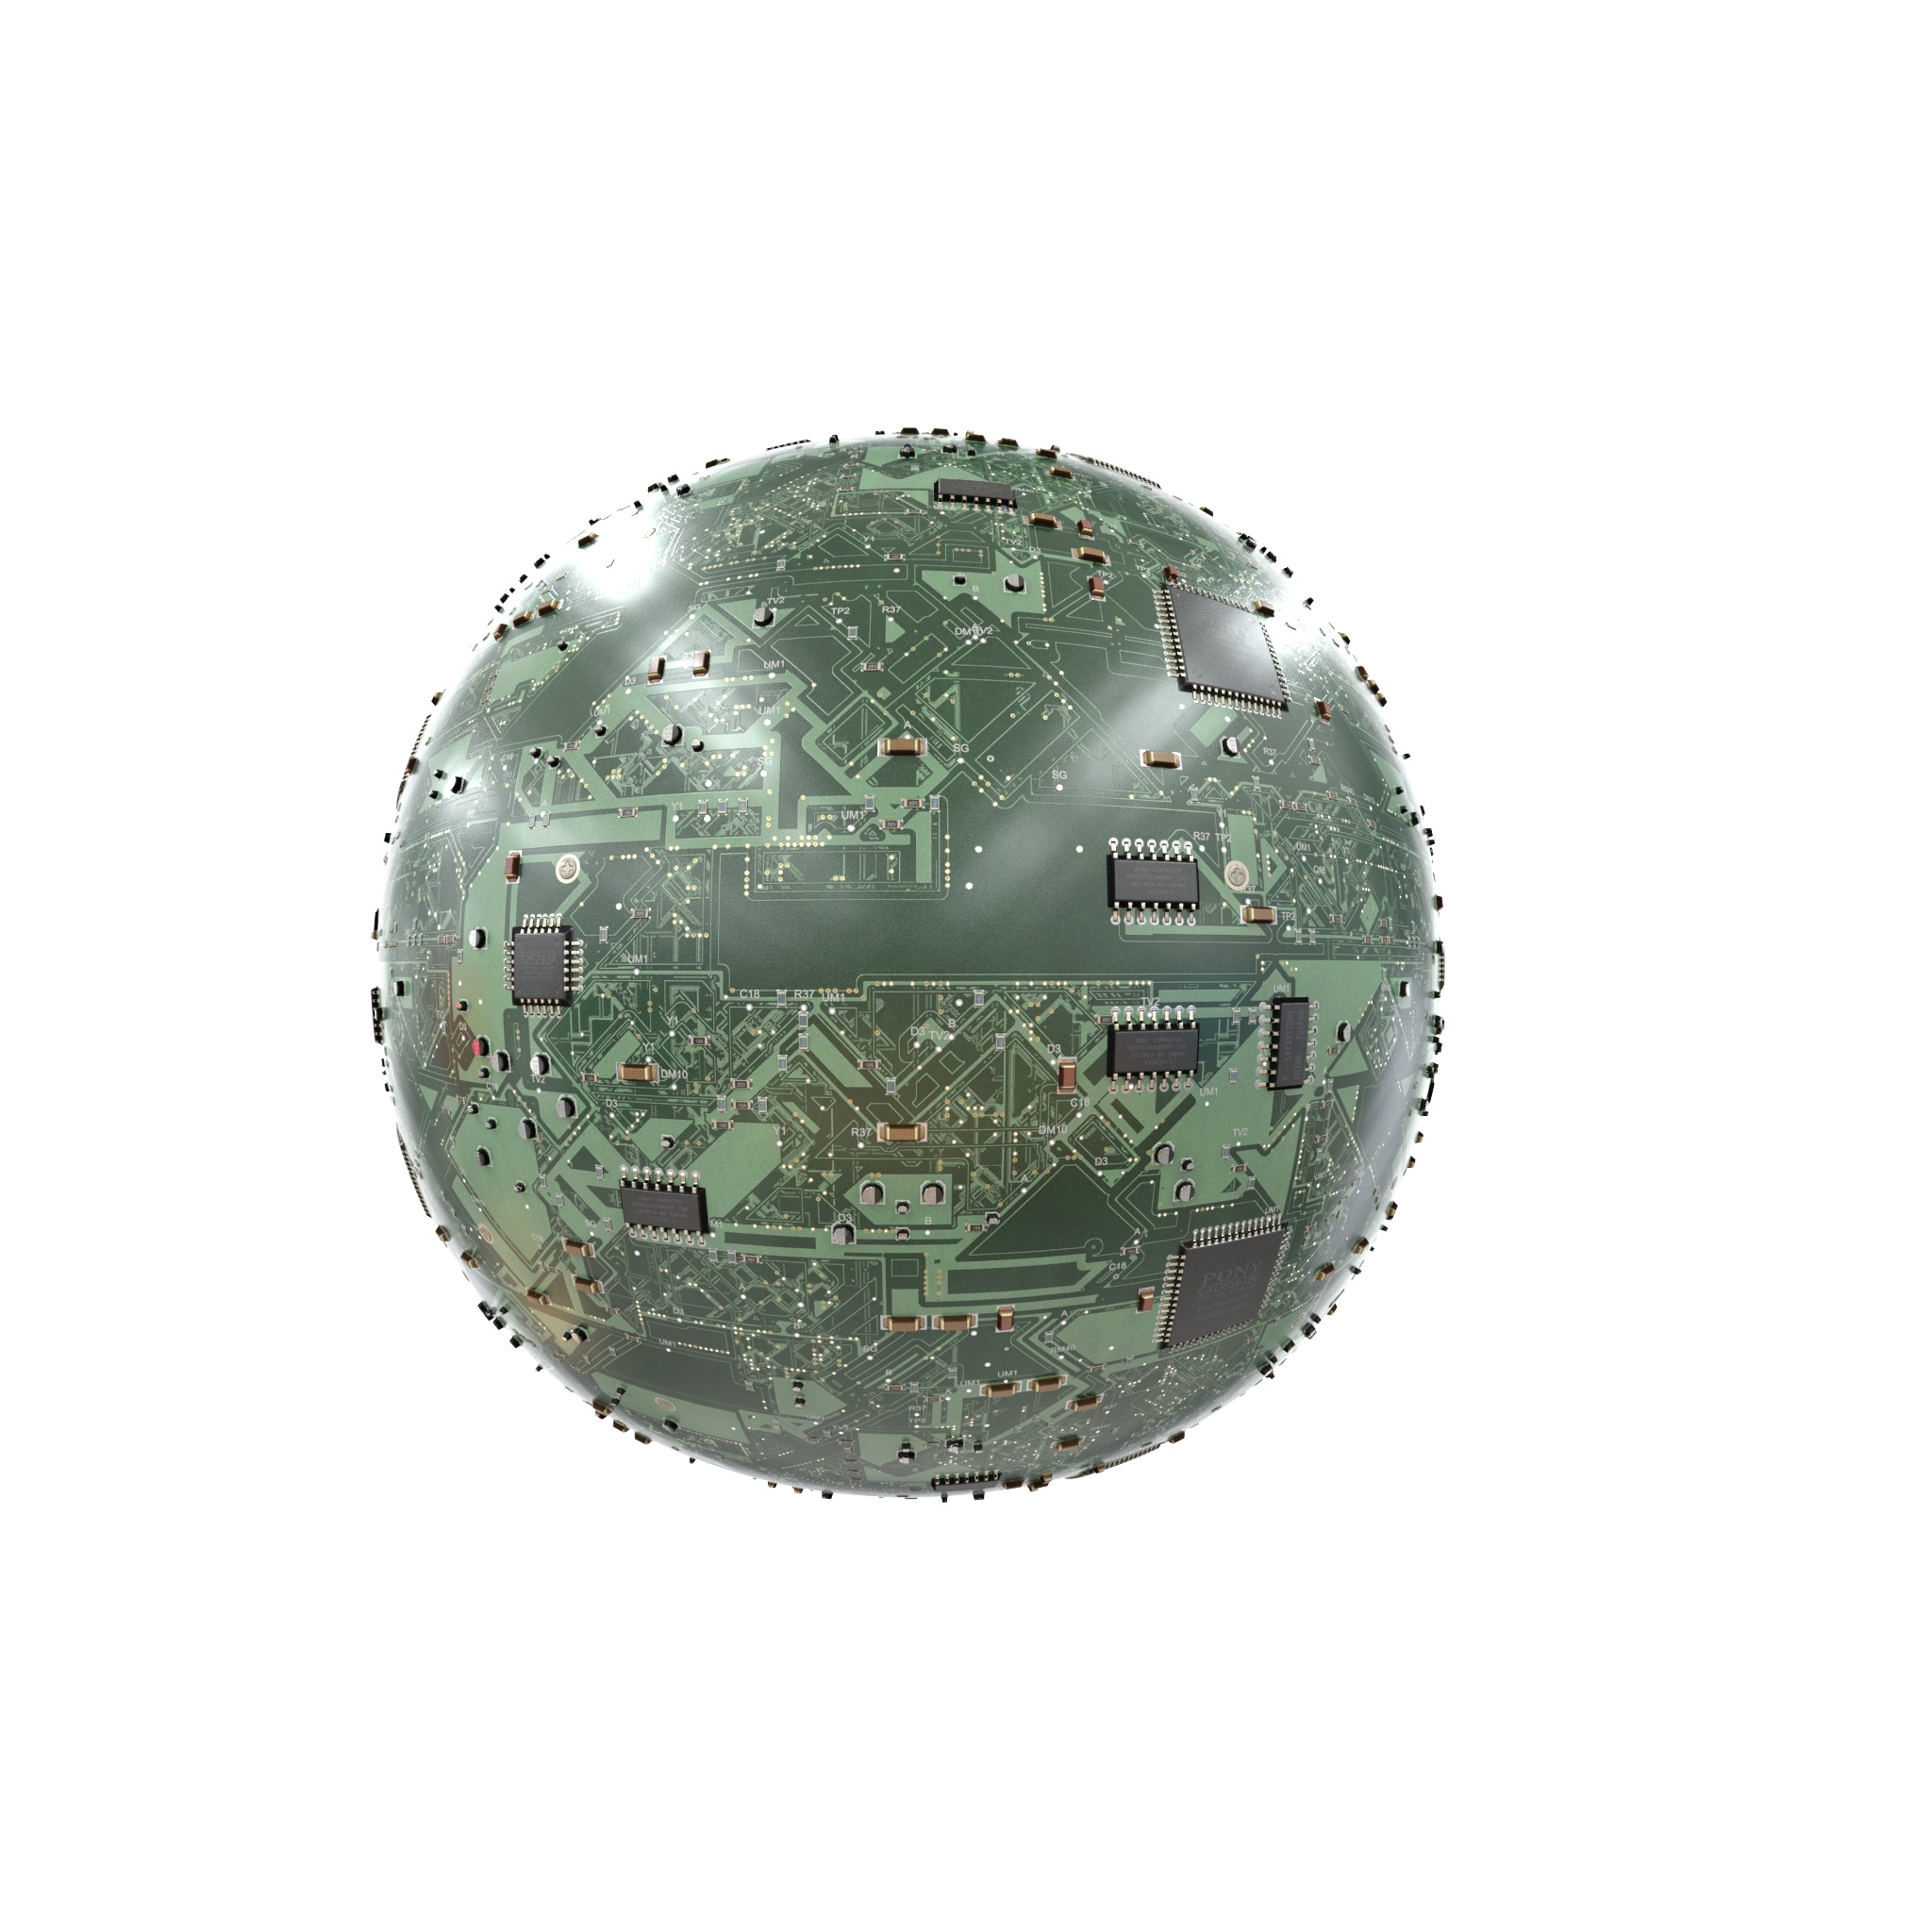
Rendered using Arnold & displacement modifer.